
Convert WordPress to SSL (https)

I’m going to show you in this tutorial how to convert WordPress to SSL (so your URL will start with https). Of course, you’ll need an SSL certificate to make this happen. Adding SSL to your WordPress installation will encrypt the data being sent back and forth from the server to the browser, giving you better security, privacy, and even SEO.
Just so I don’t face a barrage of comments from other geeks, I’ll acknowledge, first of all, that SSL is not really used any more. We really are using a newer protocol called TLS. But that knowledge doesn’t help you convert your WordPress website to the more secure “https.” So let’s get started.
1. Obtain and install your SSL certificate
You can’t very well convert your website to SSL without an SSL certificate, so this is your first step. This tutorial is made for customers of Results Internet Webhosting where you can get an SSL certificate for free. You can also watch my video on getting a free SSL certificate here. If you are with another webhosting company, you’ll have to contact them for this step—or just sign up for a new Enterprise Plan here. Then you can start building your site from scratch, or transfer your site over from another host.
2. Change your WordPress URL settings
Only do this if you are confident that typing https://yourdomain.com works. If you set your WordPress URLs to the new secure URL before it’s fully live, your site will be broken until the certificate is actually working. If you’ve following the direction in Step 1, you should have to wait less than 15 minutes.
In your WP admin menu, go to Settings > General.
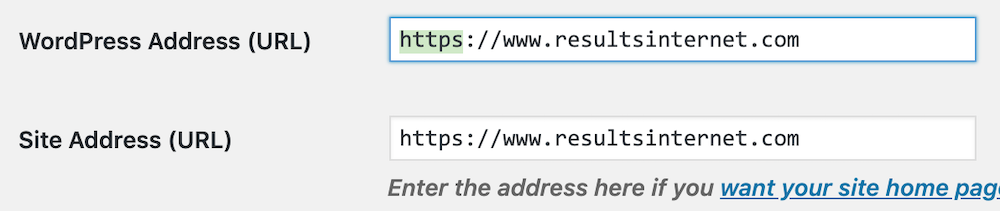
This is where you edit both URLs so that they start with https rather than http. But don’t think you are done. You have a couple more easy but important steps to do.
3. Edit your htaccess file to force https
This is an often-forgotten step. If you don’t do this, you risk having Google maintain multiple copies of your pages in its index, which would be a duplicate content issue. Besides, it’s just good webmastering.
Forcing https on your site is very simple. Just go into your Results Internet Webhosting account (or other provider) and navigate to your file manager.
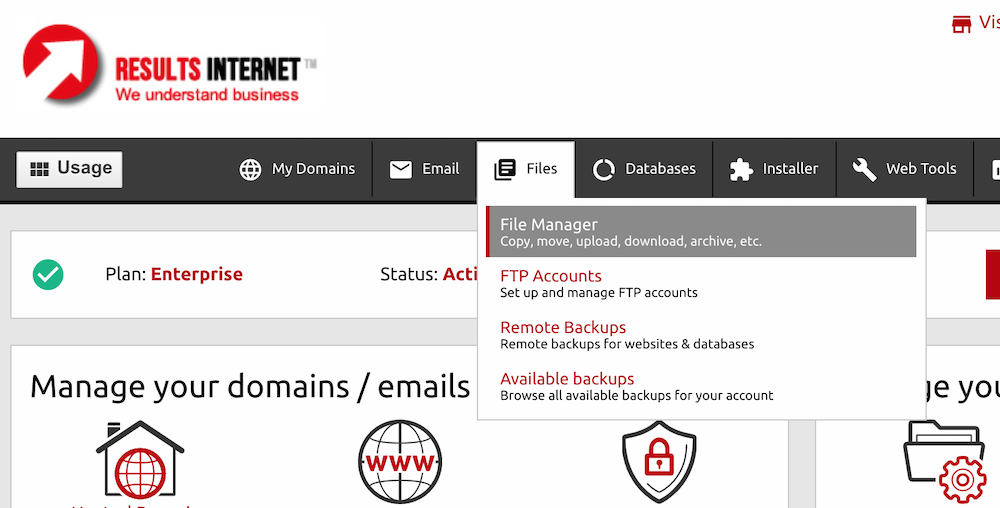
This is where you can actually view the files on your server, and edit them right from the web-based tools. This avoids having to download an FTP program, which is a security risk if you’re not using secure FTP. Double click on your domain’s folder, then scroll down to find the .htaccess file. Highlight it with a single click, then click the Edit File button.
Now you are editing the .htacess file directly. Copy and paste the following into the very top of the file:
RewriteEngine On
RewriteCond %{HTTPS} off
RewriteRule ^(.*)$ https://%{HTTP_HOST}%{REQUEST_URI} [L,R=301]
Now just save the file, and this step is complete. But wait, there’s more!
4. Search and replace URLs in your WordPress database
If you completed all the other steps and thought you were done, you’re not alone. But failing to follow this last step will leave your site getting flagged as unsecure, since there will be a mix of secure and unsecure URLs referencing your site within the WordPress database. Images are the biggest offenders. If you have dozens or hundreds of images you’ve embedded into your content, those images will still be referenced in the html using http rather than https. So to get that little lock icon to appear next to your URL in the URL bar of your browser, we need to clean those up.
Go to the WordPress plugin repository (Plugins > Add New). Now search for a plugin called “Better Search and Replace.” Install and activate that plugin.
Go to your admin menu Tools > Better Search Replace. Now copy and paste only your domain from your browser’s toolbar into both the search and replace boxes and delete the “s” in the first one. I suggest doing it this way to make sure you don’t have typos, and to make sure you are using either the www or no www, whichever way your WordPress installation is configured. You don’t want to get this wrong. It should look like this:
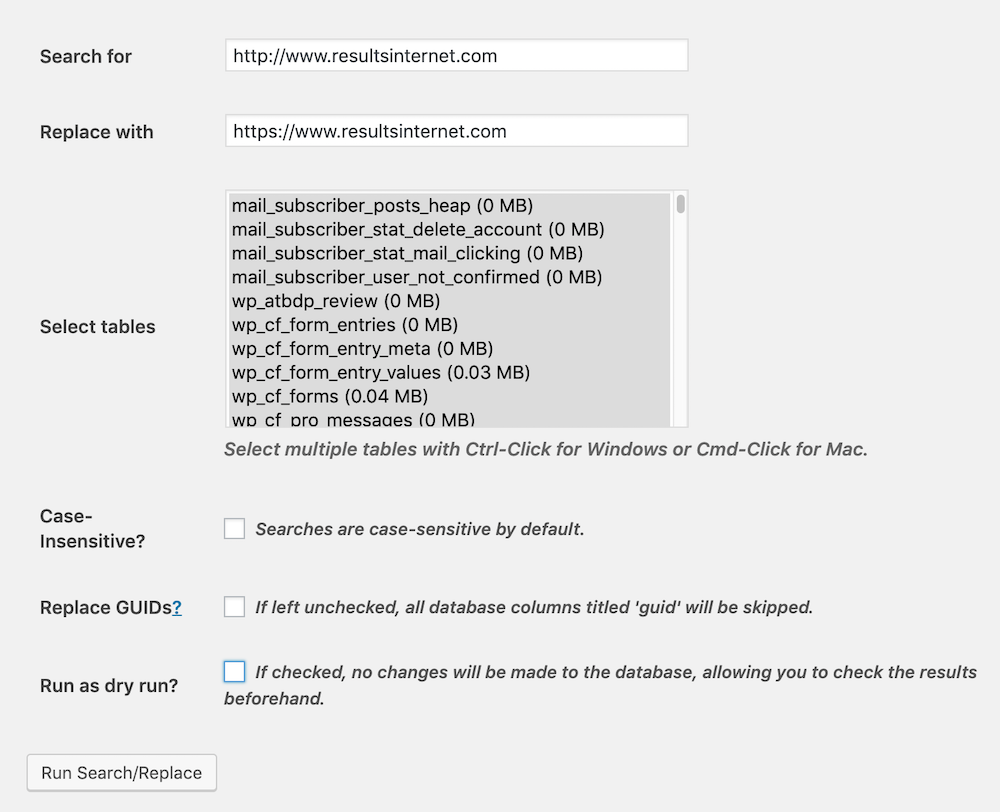
Make sure to select all WordPress tables. (Pro tip: Click the first one, hold down the shift key, scroll to the end and click the last one.) Once you’ve checked and rechecked it a couple times, you can either run the operation as a dry run, or uncheck that last box and run it live.
That’s it! Congratulations, you’ve now converted your WordPress website to SSL. Browse to your homepage and should see a nice pretty little lock icon to show your visitors you’re on the cutting edge of user security. (If you don’t see it, try refreshing your browser a couple of times, or clearing your cache.)
 [caldera_form id="CF5b2a38849abd5"]